◢ DISPATCH / MISE
Getting Started with mise
Posted on September 10, 2026·Updated on September 13, 2026·10 MIN READ·0 VIEWS
◢ This post is also available in: 日本語
What mise is
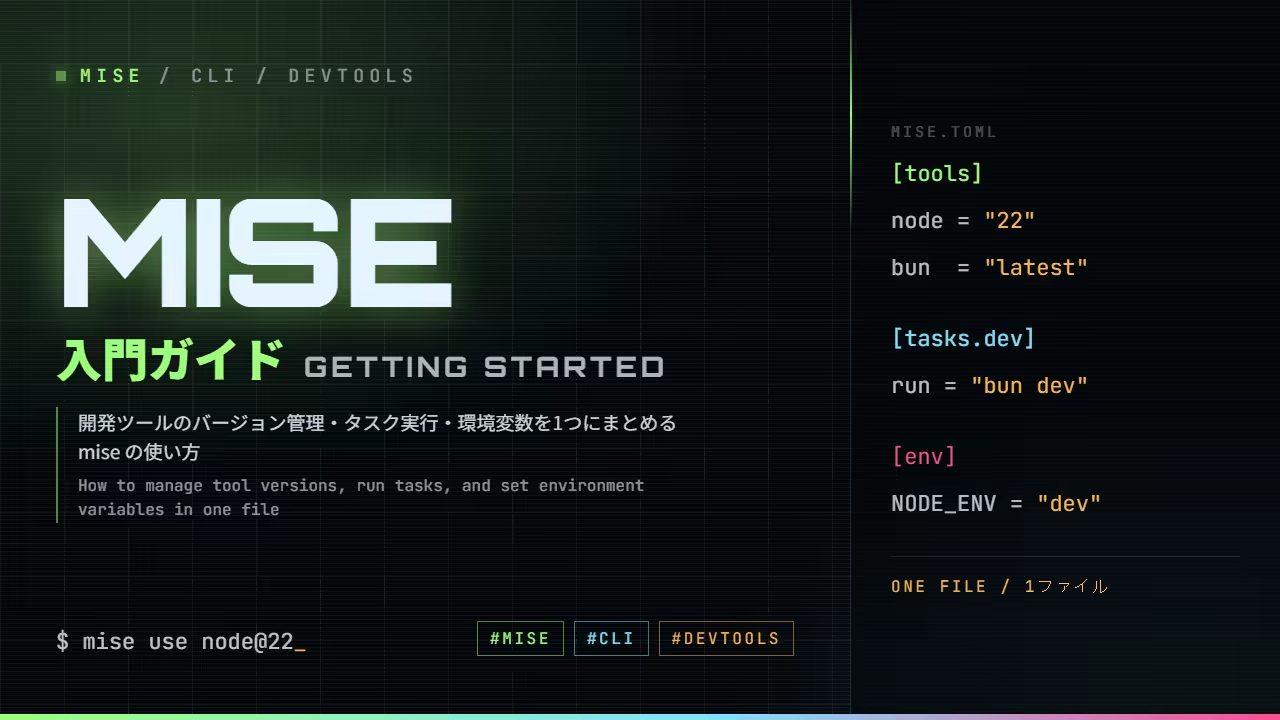
mise (pronounced "meez") is a command-line tool that combines tool version management, task running, and environment variables into one place.
Every project needs a different set of tools at different versions. The steps to run it differ, and so do the values it needs to be given. Most of that lives in a README and in things people tell each other, rather than in code.
mise solves all of that with a single configuration file.
- Tool version management — replaces nvm, pyenv, rbenv and friends
- Task runner — the equivalent of
package.jsonscripts, without being tied to one language - Environment variables — values that apply only inside a given directory
Three separate tools collapse into one mise.toml.
Here is what each of the three actually saves you from, one at a time.
Tool versions do not line up
Someone joins, clones the repository, runs the commands exactly as written, and it does not work. It turns out they have Node.js 20 on their machine and the project assumed 22. This happens constantly.
The awkward part is that the error message says nothing about versions. You get a syntax error or "that function does not exist", and it takes a while before a version mismatch is even a suspicion.
nvm and pyenv solve this too. But switching is something you do by hand, and if you start work
having forgotten to run nvm use, you are back where you began.
mise switches the moment you enter a directory that has a mise.toml. There is no command to
forget.
bash
cd ~/work/blog      # node becomes 26 here
cd ~/work/old-app   # and goes back to 22 here
Commands have scattered entry points
The dev server is bun dev, migrations are ./scripts/migrate.sh, releases are make release.
None of that is wrong. But knowing what lives where means opening three files.
Sometimes the README lists them. Usually that list stopped being updated a while ago.
With mise there is one entry point.
bash
mise tasks       # everything this project lets you run
mise run dev
The difference from package.json scripts is that it is not limited to JavaScript projects.
Shell scripts, and commands split out into files of their own, appear in the same list.
Environment variables get passed around by hand
Copy .env.example to .env. Type the export line the setup document told you to. Both only
affect the environment of the person who did it, so the next person to be stuck is whoever forgot.
The dangerous case is the opposite one: typing it and then forgetting. You export DATABASE_URL=... in one project, move to another with it still set, and a script over there talks
to the previous database. This does happen.
[env] in mise applies only inside that directory. Leave, and it is gone.
bash
cd ~/work/blog
echo $DATABASE_URL   # postgres://localhost:5432/dev
cd ~
echo $DATABASE_URL   # empty
This article covers only the first of the three, tool version management. The other two each had enough to say for an article of their own: writing tasks and managing environment variables.
Installing mise
Pick the one for your operating system.
bash
curl -fsSL https://mise.run | shpowershell
winget install jdx.miseOn macOS, brew install mise works too if you already use Homebrew. On Windows there is also
scoop install mise and choco install mise; matching whichever package manager you already have
saves trouble later.
The quickest way to check it landed is to ask it for its version.
terminal
❯ mise --version
2026.9.4 windows-x64 (2026-09-09)
1 commands2 lines
A version, a platform and a build date coming back means you are set. If you get
command not found, your PATH does not know about it yet: follow the note the installer prints at
the end, and try again in a fresh shell.
Installing tools, and running them
The command for installing a tool is mise install. The version goes after the @.
terminal
❯ mise install node@22
...
mise ✓ node@22.23.2  28.3s  node-v22.23.2-win-x64.zip
mise ████████████████ 1/1 · installed 1 tool in 28.3s
mise WARN  node installed but not activated — it is not in any config file.
To install and activate, run:
  mise use node
1 commands7 lines
Several versions can sit side by side. mise ls lists what you have.
terminal
❯ mise install node@20
...
❯ mise ls
node  20.20.2
node  22.23.2
2 commands5 lines
Installing alone is not enough to make node work, though. That is what the not activated
warning at the end of the install was about: mise does not put what it installs on your PATH.
To run it, go through mise exec.
terminal
❯ node --version
bash: node: command not found
❯ mise exec node@22 -- node --version
v22.23.2
2 commands4 lines
Before the -- is which tool; after it is what to run.
So far, honestly, this is not far from installing tools with Homebrew or apt. Keeping several versions side by side is useful, but nvm and pyenv do that much.
Where mise starts to differ
What sets mise apart is that the configuration belongs to the directory, not to the person who typed it. Two things get you there.
mise activate — switching without typing anything
Add one line to your shell configuration.
bash
# for ~/.bashrc
echo 'eval "$(mise activate bash)"' >> ~/.bashrc

# for ~/.zshrc
echo 'eval "$(mise activate zsh)"' >> ~/.zshrc
powershell
# create the profile if it does not exist, then append
if (-not (Test-Path $PROFILE)) { New-Item -ItemType File -Path $PROFILE -Force }
Add-Content -Path $PROFILE -Value '(&mise activate pwsh) | Out-String | Invoke-Expression'Once this is in, you no longer need mise exec: entering a directory swaps your PATH to the
versions used there. With a mise.toml saying node = "26" in blog and node = "22" in
old-app, walking between them in an activated shell looks like this.
terminal
❯ cd blog
❯ node --version
v26.8.2
❯ cd ../old-app
❯ node --version
v22.23.2
4 commands6 lines
The point is that there is no longer a command to forget, the way nvm use can be forgotten.
mise use — leaving the decision in a file
So where is it written down which version that directory uses? In mise.toml — and the command
that writes it is mise use.
terminal
❯ mise use node@22
mise by @jdx – installing 1 tool
mise ⇢ node@22.23.2  96ms · already installed
mise ████████████████ 1/1 · installed 0 tools · 1 already installed in 130ms
mise C:\Users\Jam\AppData\Local\Temp\misedemo\work\app\mise.toml tools: node@22.23.2
1 commands5 lines
This does two things at once. It installs Node.js 22 and writes it into mise.toml. Here it
was already installed, so the install was skipped and only the write happened.
terminal
❯ cat mise.toml
[tools]
node = "22"
1 commands3 lines
This is what separates it from mise install. Rather than stopping at putting a tool on your own
machine, it records the decision as part of the project.
Commit that file and the next person to clone the repository gets the same versions with a single
mise install. Nobody has to be told "please use Node 22" out loud.
Where does that tool come from — backends
When you type mise install node@22, where is node actually fetched from? Not knowing this is what
trips people up, in the way described further down this section.
mise does not fetch every tool the same way. It has several routes, called backends, and picks between them per tool.
| Backend | Written as | Character |
|---|---|---|
| core | node, python | Built into mise. The major languages |
| aqua | aqua:cli/cli | A registry that verifies checksums and signatures |
| npm | npm:prettier | npm packages as they are |
| cargo | cargo:ripgrep | Written in Rust; built locally, so it takes a while |
| github | github:owner/repo | Straight from GitHub Releases |
| conda | conda:ffmpeg | conda packages, unpacked with their dependencies |
Where a short name resolves to
When you write a short name like node or ffmpeg, mise's registry decides which route it takes.
There is a command for looking it up.
terminal
❯ mise registry node
core:node
1 commands2 lines
Some tools have more than one candidate.
terminal
❯ mise registry ripgrep
aqua:BurntSushi/ripgrep cargo:ripgrep
1 commands2 lines
When several are listed, they are tried left to right. For ripgrep that means reaching for the prebuilt aqua binary first and falling back to a local cargo build.
Trusting a short name and waiting nine minutes
When this blog's repository needed ffmpeg, I wrote the obvious thing.
bash
mise install ffmpeg@latestNine minutes later it had not finished. The log said this:
text
ffmpeg@9.0.1 installing tzdata 525.0sA timezone database has nothing to do with encoding video. The registry explains why.
terminal
❯ mise registry ffmpeg
conda:ffmpeg
1 commands2 lines
It resolves to a conda package, so it was being unpacked with its whole dependency tree. ffmpeg itself is a single executable; this is the package manager's shape, not ffmpeg's.
Naming the route yourself
Taking it straight from GitHub Releases was all it needed.
bash
mise install "github:BtbN/FFmpeg-Builds[exe=ffmpeg]@autobuild-2026-09-08-23-15"That finished in 112 seconds. In mise.toml it looks like this.
toml
[tools]
"github:BtbN/FFmpeg-Builds" = { version = "autobuild-2026-09-08-23-15", exe = "ffmpeg" }
exe=ffmpeg is required because mise guesses the executable name from the repository name by
default. Here it would look for FFmpeg-Builds.exe, not find it, and fail.
The pinned version has a reason too. What this repository publishes is dated master builds rather
than releases, so latest would mean fetching several hundred megabytes again on every
publication — which is most days.
Choosing between them
- When in doubt, keep the short name. Most tools resolve somewhere sensible
- If it feels slow or will not install, run
mise registryand look at the route. That is usually where the answer is - When verification matters, prefer
aqua. It checks checksums and signatures before unpacking - For anything missing from the registry, or too new for it, use
github:. In exchange, the executable name and the version become your problem
Commands worth knowing
bash
mise ls              # what is installed
mise ls-remote node  # what you could install
mise install         # get everything mise.toml asks for
mise upgrade         # update
mise doctor          # diagnose the setup
In closing
mise installonly puts a tool on your machine;mise userecords it as a project setting- With
mise activatein place, entering a directory is enough to switch versions - When something is slow or will not install, suspect the backend and run
mise registry
It is a tool for having less of "it works on my machine". In exchange for one more configuration file, the assumptions you used to convey out loud and in the README become code.
◢ RELATED DISPATCHES — Continue Exploring
 NO.001
Getting Started with Sapling
Sapling (sl), Meta's Git-compatible VCS — installing it, stacks, one PR per commit with sl pr submit, ReviewStack, and the sl web GUI
September 13, 202619 MIN0 VIEWS
 NO.002
Getting Started with Jujutsu
Jujutsu (jj), the Git-compatible version control system — installing it, how it differs from Git, and the commands you type every day
September 13, 202621 MIN0 VIEWS
 NO.003
Setting Up a Machine with mise bootstrap
Declaring packages, dotfiles, tools and a finishing task in one config file, and bringing a new machine up to it with a single mise bootstrap
September 12, 202612 MIN0 VIEWS